I noticed recently, I’m constantly flipping my skateboard over to check what is the nose and what is the tail, so it got me thinking of how many ways I can check which way around my skateboard should go. As with many skateboard decks, my element deck is quite symmetrical making it tricky to identify the nose from a simple glance, so here’s a quick guide for how you can determine the nose and tail of your skateboard deck.
Your skateboard deck graphic may show you the skateboard deck nose
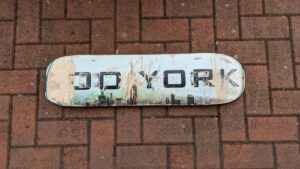
As mentioned in the introduction, I am constantly flipping my skateboard over to check whats the nose. The reason I do this, is because the deck I have has text on it, which helps my identify the nose and tail of my skateboard. This is often the case for many skateboard decks, so it’s an obvious starting point but it does mean having to turn the board over. For example in the image below from one of my old decks, the nose is where the K is. [Zoo york skateboard review]
Check the nose and tail for width
You’ll often find that the nose is wider than the tail. The reason I feel, is because they can assist with getting good rotation or flip when performing tricks on the skateboard, so there’s often a very subtle difference. I rank this as second in my list because you don’t need to do any changes to the skateboard deck to identify the nose, but you do need to be able to see the difference which can be tricky for some riders.
Add a custom bolt to the skateboard nose
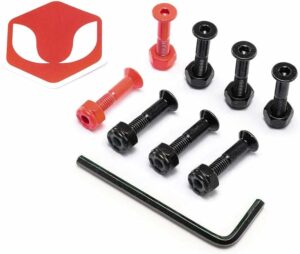
I love this one, and it’s what I did on my previous deck but just haven’t had a chance with the new one. You can remove one bolt and replace it with a different style or colour. For example, if all bolts are cross heads, then take one out and make it an allen key bolt. If all bolts are black, then take one out and replace it with a silver one (I sprayed one of my yellow). This adds the convenience of knowing that you have the skateboard deck the correct way around just by looking down (even when riding), which can give you more confidence. [Find these in the stocking filler article I wrote for Christmas] also check out your local skate store for these [Native]
Customise the grip tape on your skateboard decks nose
I’ve not done this yet, but I’ve seen many riders who have. They will customise the grip tape they install on the skateboard deck, so that there is an identifying feature on it. The simplest is to have the grip cut in two. The larger section being on the bulk of the board, then a small line/gap across the width of the deck and the second part of the grip applied. This results in a horizontal line across the nose side of your skateboard deck. Other things I’ve seen include adding text to the grip, or colour etc.
Make a mark on the skateboard deck nose
I know this sounds odd, but in my current set up because I haven’t done step 3 in this list of identify the nose of my skateboard deck, I have noticed damage on my board from a previous trick. The damage is that a small piece of my grip tape has come off, near the nose end of my board and I can now see which is the nose of my skateboard quite easily. I wouldn’t advise on doing this purposely, more along the lines of, if your skateboard deck is getting old, you may have a piece of damage you can use to help.
I hope that this article has provided you with some simple but effective ways to identify the nose of your skateboard in future, and even answer “what is the nose of my skateboard” or “which side is the nose of my skateboard” because knowing this can really improve your skateboarding experience, and some of the options above, can help you bring in your individual style to your skateboarding.